Author: Janine Wittchen

  • The Best Low-Maintenance Plants for Around a Pool

    The Best Low-Maintenance Plants for Around a Pool

    A pool should feel like part of the garden, not an isolated rectangle surrounded by paving. The right planting softens hard edges, brings privacy and shade, and creates the sense of escape that makes a pool area enjoyable even when nobody is swimming.

    Poolside planting has to work harder than planting elsewhere in the garden. It may need to tolerate reflected heat, bright sun, coastal wind and occasional splashes of chlorinated or salt water. At the same time, it should not fill the pool with leaves, crowd narrow paths or develop roots that threaten paving and pool structures.

    Low maintenance does not mean no maintenance. Every plant needs watering while it establishes, and even the toughest poolside garden benefits from occasional pruning and removal of spent foliage. The aim is to choose plants whose natural habit suits the space, so upkeep remains simple rather than becoming a constant battle.

    What makes a good low-maintenance poolside plant?

    Before choosing plants, consider how close each garden bed sits to the water and how the pool is used. A plant beside a quiet boundary has a different job from one beside a narrow path where wet feet, towels and pool toys regularly pass.

    The most useful poolside plants generally share several qualities:

    • evergreen or long-lasting foliage
    • low levels of leaf, flower and fruit drop
    • roots that are unlikely to disturb paving or pool structures
    • tolerance of reflected heat and occasional splash
    • a mature size that fits the available garden bed
    • foliage that will not scratch swimmers or obstruct paths
    • simple maintenance that can be handled once or twice a year

    Pool type matters too. Saltwater splash can damage sensitive plants, while chlorine may mark soft foliage. Gardening Australia recommends hardy plants with waxy, silvery or leathery leaves, while also warning against deciduous plants, fine foliage that clogs filters and trees with aggressive roots.

    The position of each plant remains just as important as the species. A sculptural plant can be perfect at the back of a generous bed but uncomfortable beside a narrow walkway. Likewise, a plant with some seasonal leaf drop may work well several metres from the water even if it would be frustrating beside the coping.

    Our favourite low-maintenance plants for around a pool

    These five plants all appear in Growing Rooms gardens. We use them for different reasons and in different combinations, depending on the architecture, light, soil and character of the site.

    1. Tanika® Lomandra (Lomandra longifolia ‘LM300’)

    Tanika Lomandra is a reliable way to bring movement and softness to a sunny pool garden. Its narrow green leaves form a tidy clump, creating contrast against stone, concrete and timber without overwhelming the space.

    Mass-planted Tanika Lomandra forming soft green clumps beside a garden path
    Repeated clumps of Tanika® Lomandra soften the edge of a garden path.

    It works particularly well when repeated through a long garden bed or used to connect larger feature plants. The foliage is soft to touch, which makes it a practical choice near family gardens and circulation areas. Once established, it tolerates dry periods and needs little more than an occasional tidy to remove older foliage.

    Allow enough space for each plant to retain its natural arching form. Crowding Lomandra against coping or a narrow path usually creates more maintenance, as the foliage will need to be cut back repeatedly.

    Best for: sunny beds, mass planting, family pool gardens and softening long runs of paving.

    2. Liriope (Liriope muscari)

    Liriope is one of our favourite choices for the lower layer of a poolside garden. It forms compact evergreen clumps and performs well in part shade, making it especially useful beneath taller planting, beside built-in seating or in areas shaded by the house.

    Purple Liriope flower spikes rising above arching green foliage
    Purple flower spikes bring seasonal colour above Liriope’s evergreen, strappy foliage.

    Its deep green, strappy foliage creates a neat edge without looking overly formal. Small purple flower spikes provide seasonal detail, but the plant’s main design value is its consistent foliage and ability to knit a planting scheme together.

    Liriope is adaptable to a range of soils once established, although it performs best with reasonable drainage. An annual removal of tired leaves is usually enough to refresh the clump. Plant it in groups rather than as isolated specimens to create a stronger, calmer result.

    Best for: part shade, narrow borders, underplanting and softening the base of walls or screens.

    3. Foxtail Agave (Agave attenuata)

    Foxtail Agave gives a pool garden strong sculptural form with very little ongoing work. Unlike many agaves, it does not have the same rigid terminal spine, and its broad rosettes create a bold contrast against fine grasses, clipped planting and clean-lined paving.

    Foxtail Agave and cascading groundcover planted above a stone pool wall
    Foxtail Agave brings bold sculptural foliage to layered planting above a stone pool wall.

    Its fleshy foliage is well suited to hot, free-draining positions and can cope with the bright conditions often found around pools. It is also one of the plants recommended by Gardening Australia for saltwater pool environments.

    Although its leaves are softer than those of many agaves, placement still matters. We prefer to give it room within a garden bed rather than squeeze it beside a narrow walkway. Remove older lower leaves as needed, wear gloves when pruning and avoid contact with the sap.

    Best for: sunny and free-draining beds, sculptural accents, coastal gardens and contemporary pool designs.

    4. Heliconia ‘Hot Rio Nights’

    Heliconia ‘Hot Rio Nights’ brings height, privacy and a strong tropical character to a pool garden. Its large green leaves create a lush backdrop, while glossy red flowers provide bold seasonal colour through the warmer months.

    Tall Heliconia Hot Rio Nights forming a lush green screen behind a swimming pool in Maroubra
    Mature Heliconia ‘Hot Rio Nights’ creates a dense tropical screen in this Maroubra garden, designed and built by Growing Rooms.

    This is a substantial clumping plant rather than a compact accent. We use it at the back of a generous garden bed, where its fast growth can screen a wall or neighbouring property without crowding the pool edge. It performs best in a warm, sheltered position with sun to part shade, rich well-drained soil and reliable moisture.

    Maintenance is straightforward when the plant has enough room: remove old leaves and cut finished flowering stems at the base, then thin the clump if it begins to spread beyond its allocated bed. The broad foliage can tear in wind, so avoid exposed positions and allow enough setback to keep leaves clear of coping and paths.

    Best for: warm sheltered pool gardens, tropical screening, generous rear borders and bold red flowers.

    5. Philodendron Xanadu (Philodendron xanadu)

    Philodendron Xanadu creates a dense, rounded layer of deeply lobed green foliage. It brings a lush tropical quality without the height of a large philodendron, making it useful where poolside planting needs substance while remaining below sightlines.

    Philodendron Xanadu mass planting in a raised garden bed below taller tropical foliage
    Philodendron Xanadu creates a dense architectural understorey at the front of this raised garden bed.

    Its compact clumping habit works particularly well beneath taller screening plants, beside built-in seating or through a broad shaded border. Repeating it in groups creates a strong architectural understorey and helps connect the lower Liriope layer with taller Heliconia planting.

    Choose a position with bright filtered light or part shade, protection from harsh afternoon sun and moist, well-drained soil. Set it back from areas that receive frequent direct pool splash. Maintenance generally involves removing older or damaged leaves at the base and allowing enough room for the clump to retain its natural shape.

    Best for: part shade, tropical underplanting, broad low structure and softening walls or built-in seating.

    Plants to keep away from the pool edge

    Some plants can still have a place in the wider pool garden but should be set back from the water. Deciduous trees and frangipanis create beautiful seasonal structure, yet their leaf drop can become frustrating directly beside a pool. Fine-leaved trees can also overwhelm filters, particularly after wind or rain.

    Running bamboo, rubber trees and other plants with vigorous root systems should not be planted close to pool structures. Clumping bamboo behaves differently from running bamboo, but it still needs adequate room and thoughtful placement because of its mature size and leaf drop.

    Avoid thorny or sharply spined plants beside coping, steps and paths. If a sculptural plant has pointed foliage, place it deeper within the bed where it can be appreciated without brushing against swimmers.

    Designing a layered pool garden

    The strongest pool gardens combine plants with different forms rather than relying on one species. A low layer of Liriope can soften the paving, Lomandra can add movement through the middle of the bed, and Philodendron Xanadu can provide a broad architectural understorey. Heliconia ‘Hot Rio Nights’ creates height and screening at the back, while a carefully positioned Foxtail Agave adds a sculptural focal point without visual clutter.

    This approach can be seen in our Cronulla garden, where Lomandra and Agave bring movement and sculptural contrast around the family pool. In our Bondi multilevel garden, Liriope, Agave and Philodendron help create a lush coastal retreat around a compact pool.

    The final palette should respond to the pool type, available light, garden-bed depth and the amount of screening required. Choosing fewer plants and repeating them generously usually creates a more resolved garden—and makes ongoing care much simpler.

    For help creating a pool and planting scheme that feels like one complete landscape, explore our landscape and pool design service or speak with the Growing Rooms team.

  • Garden Screening Ideas: How to Create a Layered Screen

    Garden Screening Ideas: How to Create a Layered Screen

    A good garden screen gives you privacy without making the garden feel boxed in. It filters an unwanted view, creates a sense of enclosure and helps the spaces around it feel calm and considered.

    A clipped hedge can be exactly the right solution in some gardens. But screening does not have to stop at a single row of identical plants. By combining a dependable background with small trees, shrubs and lower planting, a boundary can become part of the garden rather than simply something that hides what is beyond it.

    At Growing Rooms, we usually work with a mix of native and exotic plants. The right combination depends on the architecture, soil, aspect, available space and the feeling we want to create. What matters most is how the plants work together: their heights, forms, textures and performance over time.

    Start with the view, not the plant list

    Before choosing plants, identify exactly what needs to be screened. Is it a neighbouring window, a second-storey outlook, a busy street, a pool pump or a plain fence?

    The position and height of that view will guide the structure of the planting. A low boundary may only need a dense middle layer. An overlooking window may call for the canopy of a well-placed small tree. A long exposed edge might benefit from a hedge or built screen, softened by planting in front.

    It is also worth considering where the garden will be seen from. The most important sightline may be from the kitchen, the outdoor dining table, the pool or a favourite chair. Screening is most successful when it is designed from these everyday viewpoints rather than treated as a continuous wall around the entire property.

    Let the background do the dependable work

    Every layered screen needs a reliable backbone. This might be an existing hedge, a line of upright shrubs, a fence, a masonry wall or a timber screen. Its job is to provide consistent coverage while the planting in front creates character and seasonal change.

    At our Maroubra garden, we retained much of the established Lilly Pilly hedge for privacy, then layered a mix of native and exotic species around it. The hedge provides the dependable green background; the varied foliage and forms in front stop it from reading as a flat boundary.

    Timber slat bench with white and pale green cushions beneath a spreading tree
    A mature background screen feels less formal when it is connected to the rest of the garden through planting and places to sit.

    Here, the timber bench beneath the established tree makes the planted boundary part of the outdoor living area. Rather than reading as a separate privacy treatment, the screen becomes the backdrop to a place to pause and enjoy the garden.

    Use small trees to interrupt higher views

    Small trees are one of the most useful tools in a screening garden. Their canopies can filter an elevated sightline while leaving space and light beneath them for other plants.

    Depending on the garden, that upper layer might include a Magnolia, Camellia or Crepe Myrtle, or a native Banksia, Tea Tree, Water Gum or compact Eucalypt. Some offer flowers, some bring sculptural trunks and others contribute fine foliage or movement.

    The aim is not necessarily to form an unbroken row. A few trees placed where they are genuinely needed can be more effective, and far more beautiful, than planting every boundary at the same height. Always allow for mature canopy size and root space, and check how the tree will relate to buildings, paving, pools and neighbouring properties.

    Slim feature tree against a timber clad wall above stepping stones and a woven lantern
    A small feature tree adds height and interrupts the view, while the lower planting keeps the composition connected to the garden.

    Build density through the middle

    The middle layer is where much of the visual weight sits. It fills the space between the tree canopy and the ground, hides gaps in the background and gives the screen a generous, garden-like quality.

    Useful shrubs might include Lilly Pilly, Murraya, Viburnum, Camellia, Gardenia or Heliconia, alongside natives such as Tea Tree, Hop Bush, Grevillea, Correa or Westringia. The exact palette will depend on sun, soil, exposure and the style of the garden.

    Rather than collecting too many unrelated plants, repeat a limited number through the bed. Repetition gives the planting rhythm and makes a mixed palette feel calm. Varying the leaf size, tone and form within that palette creates depth without visual clutter.

    Flowers are a welcome extra, but foliage does most of the work in a screening garden. Think about the contrast between glossy and matte leaves, fine and broad foliage, deep green and silver tones, upright forms and looser shapes. These differences help one layer remain visible against the next.

    Soften the base with lower planting

    Lower-growing plants are what make a screen feel settled into the garden. They conceal bare stems, soften the edge of paving or lawn and fill the small gaps that are especially noticeable from nearby seating areas.

    Lomandra, Liriope, low-growing Correa, compact Westringia, Philodendron, smaller succulents and spreading groundcovers can all play this role in the right conditions. Some provide strappy movement, others rounded foliage or a soft carpet at ground level.

    Mixed bed of silver foliage, lime box balls and groundcover in dappled light
    Contrasting foliage gives the lower layer definition and helps disguise the base of taller screening plants.

    This layer does not need to be deep everywhere. Even a narrow ribbon of planting can soften a hedge or fence. Where there is more room, allowing plants to overlap in loose groups creates a fuller and more natural effect.

    Mix plants for the site, not for the label

    There is no need to choose between an entirely native or entirely exotic palette. Both can contribute valuable qualities, and many of our gardens combine them.

    A native shrub might be selected for its fine foliage, habitat value or ability to handle a difficult exposure. An exotic small tree might provide the exact canopy, flower or seasonal character the space needs. What makes the combination successful is compatibility: the plants should enjoy similar conditions and sit comfortably together in scale, texture and colour.

    Before finalising the palette, consider:

    • how much direct sun reaches each part of the bed
    • drainage and soil depth
    • reflected heat from walls and paving
    • wind and salt exposure
    • the room available at maturity
    • access for pruning and maintenance
    • whether falling leaves or flowers will affect a pool or entertaining area

    Choosing for the conditions makes the screen more resilient and reduces the need to force plants into shapes or sizes that do not suit them.

    Layering works in a small garden too

    A layered screen does not require a large suburban boundary. In a compact garden, each plant simply has to work harder.

    At Surry Hills, a dark rear wall provides a quiet background for a small Japanese Maple, grasses, succulents and lower foliage. The contrast makes the planting feel deeper than it is, while the varied heights create interest without taking over the courtyard.

    Overhead view of a compact courtyard with timber dining table sandstone wall and slatted bench seating
    In a small garden, a simple backdrop and a few clearly defined layers can create depth without using too much floor space.

    Espaliered plants, pleached trees and slender upright forms can also be useful where bed width is limited. A climber over a structural screen may provide coverage while leaving room below for softer planting. The important thing is to keep the composition legible rather than squeezing in one of everything.

    Design it to look good from both sides

    Screening plants often sit along a shared boundary, beside a path or between two garden rooms, so they may be viewed from more than one direction.

    Where possible, avoid creating a composition with a clear front and an untidy back. Use plants with attractive natural habits, stagger their positions and allow enough room for each one to develop. If a clipped hedge is part of the design, give it sufficient access for maintenance on both sides.

    This matters beyond appearance. Good spacing improves airflow, makes pruning easier and helps prevent one vigorous plant from overwhelming its neighbours.

    Plan for establishment and maintenance

    A newly planted layered screen will not provide instant density. Trees and shrubs need time to establish their root systems and settle into the site. Buying the largest plants available is not always the best shortcut; well-selected plants in appropriate sizes often establish more successfully and catch up quickly.

    Prepare the soil, mulch well and provide consistent water while the plants establish. Drip irrigation can make this easier, especially in a long or narrow boundary bed.

    Once established, the aim is to guide rather than constantly control the planting. Selective pruning can maintain sightlines, encourage density and preserve the distinct layers. Avoid clipping every plant into the same shape, or the screen will gradually lose the contrast that makes it interesting.

    Make privacy part of the garden

    The best garden screening ideas do more than hide a view. They create an outlook of their own.

    By combining a reliable background with carefully placed trees, a substantial middle layer and softer planting at ground level, privacy becomes part of the overall garden experience. A considered mix of native and exotic plants can bring year-round structure, seasonal moments, movement and habitat—while still doing the practical job the garden needs.

    The result is not simply a screen. It is a layered piece of garden design that feels generous, established and connected to the home.

    For more planting inspiration, explore our guide to native groundcovers for Sydney gardens. If you are planning a new garden or reworking an exposed boundary, learn more about our landscape and pool design service or contact the Growing Rooms team.

  • How to Prepare Your Garden for an El Niño Summer

    How to Prepare Your Garden for an El Niño Summer

    The best time to prepare a garden for a hot, dry summer is before the plants begin to struggle.

    In early August, the Bureau of Meteorology confirmed that El Niño was firmly established and continuing to strengthen. Oceanic and atmospheric indicators were consistent with a strong event, with further intensification likely through spring and a peak expected in late spring or summer. The Bureau’s latest long-range forecast also indicates above-average temperatures across much of Australia, with below-average spring rainfall likely across parts of the south and east.

    That does not make the season entirely predictable. The Bureau cautions that a strong El Niño signal does not necessarily produce equally strong local effects, and ENSO is only one of several influences on Australia’s climate. For a Sydney gardener, the useful response is preparation rather than panic: improve the way the garden holds and receives water now, then adjust care as the weather unfolds.

    1. Check the irrigation before the first hot spell

    Do not wait for a week of extreme heat to discover a split line, flat controller battery or blocked dripper.

    Run every irrigation zone and walk through the garden while it operates. Look for dry gaps, leaks, damaged tubes, blocked emitters and sprays landing on paving or walls. Check that plants with very different needs are not being watered on the same program.

    Growing Rooms installs a rain sensor with every irrigation system, so scheduled watering is suspended when useful rain arrives. We use Hunter NODE-BT Bluetooth controllers in many of our gardens, allowing clients to review and adjust the program from a nearby phone.

    If you are deciding whether an automatic system is worthwhile, our guide to irrigation systems versus hand watering explains how zoning, drip delivery, programming and rain sensing affect water efficiency.

    2. Find out what is happening below the surface

    Soil can look damp at the surface while remaining dry around the roots. After watering, use a small trowel or soil probe to check how far the moisture has travelled. If the top few millimetres are wet but the soil below is dry, a quick daily sprinkle is not doing enough.

    Water needs to soak into the root zone without running away across compacted soil. Where water pools or runs off, shorter irrigation cycles with pauses between them can help it absorb. Soil preparation and organic matter can also improve water-holding capacity, but additions should suit the existing soil and planting rather than being applied indiscriminately.

    New planting, lawns and pots require closer observation because their roots have less access to stored moisture. Established drought-tolerant plants may need much less frequent support.

    3. Top up mulch before the weather becomes extreme

    Mulch shades the soil, slows evaporation and helps reduce weed competition. It is one of the simplest ways to make irrigation more effective.

    Top up thin or bare areas in spring, after removing weeds and watering dry soil. Spread mulch evenly rather than piling it deeply against trunks, crowns or plant stems, where retained moisture can cause problems.

    Different gardens call for different materials. An organic mulch can suit informal and densely planted beds, while gravel may be appropriate for some dry, architectural planting. The important consideration is how it behaves on the site: very fine mulch can wash down a slope, while thick, matted layers may prevent water from reaching the soil.

    River pebbles, groundcover planting and lawn in a Coogee garden
    Pebbles can suit selected dry, architectural planting schemes when the material and plants are appropriate for the site.

    4. Decide which plants need priority

    During dry weather, watering every part of a garden equally is rarely the best use of water.

    Give priority to:

    • recently planted trees, shrubs and groundcovers
    • pots and raised planters, which dry faster than garden beds
    • plants exposed to hot western sun and reflected heat
    • areas beneath eaves that miss light rainfall
    • valuable established trees showing genuine moisture stress

    Mature, well-established plants suited to the site may need less intervention. Grouping plants with similar water requirements makes this judgement easier and prevents drought-tolerant planting from being overwatered simply because it shares a zone with thirstier species.

    5. Protect pots and sensitive planting from radiant heat

    A plant may be exposed to more than the air temperature. Masonry walls, dark fences, paving and pool surrounds can store and reflect heat long after the sun has moved.

    Move portable pots out of severe afternoon sun before a heatwave, or group them where they receive some shelter. Check that containers drain freely and consider whether a larger pot would provide a more stable volume of soil around the roots.

    For newly installed or vulnerable plants, temporary shade cloth can reduce stress during an exceptional hot spell. Position it so air can move around the foliage and remove it once conditions ease. This is short-term protection, not a substitute for selecting plants suited to the position.

    Drought-tolerant foliage in a sheltered planter in a Maroubra garden
    Pots dry faster than garden beds, so position, plant choice and soil volume matter during hot weather.

    6. Help plants establish deeper roots

    Frequent light watering encourages roots to remain close to the surface, where the soil heats and dries quickly. A slower, more thorough watering generally supports deeper rooting and creates a more resilient plant.

    The right frequency will vary with soil, slope, plant type and weather. Check the soil rather than relying on a universal timetable. A newly planted garden still needs regular establishment watering, even when the plants are considered drought tolerant once mature.

    Avoid heavy pruning during extreme heat unless damaged growth creates a safety issue. A plant with a healthy canopy can shade its own stems and root zone. Schedule substantial pruning and planting for milder conditions wherever possible.

    7. Be realistic about the lawn

    A lawn is often the thirstiest part of a residential garden. Before summer, check irrigation coverage, aerate compacted areas where appropriate and address soil conditions so water can reach the roots.

    Raise the mower height as the weather warms. Slightly longer grass shades the soil and supports deeper roots. Avoid removing too much leaf in one cut, particularly during hot or dry weather.

    It may also be sensible to accept a lawn that is less intensely green through a difficult summer. Trying to maintain a lush spring appearance through every heatwave can consume large amounts of water. Focus on keeping the lawn healthy enough to recover rather than forcing constant soft growth.

    Established lawn and layered garden beds in a Hunters Hill garden
    Healthy lawns benefit from deep watering, a suitable mowing height and realistic expectations through dry weather.

    8. Adjust the plan as the season changes

    An irrigation controller should not run the same program in September, January and May. Review the schedule after rain, during cool changes and as plants establish.

    Continue to inspect the garden between programmed cycles. Wilting does not always mean a plant needs more water; root damage, poor drainage and excess watering can create similar symptoms. Check the soil before increasing the program.

    Sydney Water’s Water Wise Guidelines apply throughout the year. At the time of writing, gardens may be watered with drinking water before 10 am or after 4 pm. Drip irrigation and smart watering systems may also be used between 10 am and 4 pm, and water must not be allowed to run onto hard surfaces.

    A resilient garden begins with its design

    The strongest protection against a hot, dry summer is a garden designed for its site. Suitable plants, healthy soil, useful shade, layered planting, sensible lawn areas and well-planned irrigation all reduce the amount of emergency care required later.

    Preparation does not mean turning every garden into a dry landscape. It means matching water use to the plants and conditions, then creating a system that can be adjusted intelligently as the season changes.

    If you would like help preparing an existing garden or planning a more resilient new landscape, speak with the Growing Rooms team. We can review planting, soil, irrigation and maintenance together so the whole garden is ready for the warmer months.

  • Your Spring Garden Maintenance Checklist for Sydney

    Your Spring Garden Maintenance Checklist for Sydney

    Spring brings longer days, warmer soil and a burst of new growth to Sydney gardens. It is also the ideal time to deal with the effects of winter and prepare the garden for the hotter months ahead.

    The best spring maintenance is not a frantic clean-up completed in one weekend. It is a considered reset: assessing what the garden needs, supporting healthy new growth and making sure its soil, lawn and irrigation are ready for summer.

    Here is where we recommend starting.

    1. Begin with a garden health check

    Walk through the garden before reaching for the tools. Look for:

    • waterlogged or compacted areas
    • broken, dead or damaged branches
    • plants that have outgrown paths, windows or other plants
    • early signs of pests or disease
    • weeds that are about to flower or set seed
    • bare lawn areas and worn edges
    • leaking irrigation, blocked drippers or uneven watering
    • mulch that has broken down or moved away from the soil

    This first inspection helps separate what genuinely needs attention from work that can wait. It is particularly important after a wet winter, when drainage problems and stressed plants can become more obvious.

    2. Prune selectively, not automatically

    Spring is a good time to remove dead or damaged growth, lightly shape many hedges and clear spent foliage from ornamental grasses and strappy plants. Selective pruning improves airflow, keeps paths usable and allows fresh growth to become the focus.

    However, not every plant should be cut back at the same time. Spring-flowering shrubs are generally best pruned after flowering, and some plants respond poorly to hard pruning into old wood. The right approach depends on the species, its flowering cycle and the role it plays in the design.

    Neatly shaped hedge of white vinca in full bloom beside the path

    Spring pruning should support the plant’s natural form and flowering cycle. Kensington project.

    3. Weed before spring growth accelerates

    Small weeds are much easier to manage before warmer weather sends them into rapid growth. Remove them before they flower and seed, taking care around the roots of established plants.

    Once the beds are clear, check whether groundcovers and layered planting can be strengthened to shade exposed soil. A well-planted garden will not eliminate maintenance, but it can reduce open space where weeds establish.

    4. Improve the soil and feed where needed

    Healthy spring growth begins below ground. Top-dressing garden beds with quality compost or organic matter can improve soil structure, water retention and biological activity without unnecessarily disturbing established roots.

    Fertiliser should be matched to the plants and the condition of the soil rather than applied as a one-size-fits-all treatment. Many Australian natives, including grevilleas and banksias, are sensitive to high phosphorus, so use a suitable low-phosphorus product where required. Waverley Council’s guide to starting a native garden is a useful local reference.

    Apply fertiliser at the recommended rate and water it in well. More is not better.

    5. Refresh the mulch

    Mulch is one of the most effective ways to help a garden through warmer weather. It slows evaporation, moderates soil temperature, protects soil structure and helps suppress new weeds.

    The right product depends on the planting, the area being mulched and whether an organic or inorganic finish is appropriate. ANL’s practical guide, What Mulch Is Right for My Garden?, explains the main options and where they work best.

    Before topping it up, make sure water can still reach the soil beneath. Apply an even layer rather than building a thick barrier, and keep mulch clear of trunks, stems and plant crowns to reduce the risk of rot.

    Bluestone and pale pavers set among box balls, mulch and grassy groundcover

    An even mulch layer protects exposed soil while keeping plant stems and crowns clear. Cronulla project.

    6. Wake the lawn up carefully

    As the lawn returns to active growth, spring maintenance may include:

    • mowing and redefining edges
    • aerating areas that are genuinely compacted
    • removing excessive thatch where it is preventing water penetration
    • lightly top-dressing uneven or tired areas
    • repairing bare patches
    • applying a lawn-specific fertiliser once active growth has begun

    Avoid aggressive renovation while the grass is still dormant. Lawn type, shade, drainage and soil condition should guide the timing and treatment. Maintaining a slightly higher mowing height as the weather warms can also help shade the soil and support deeper roots.

    Palm and cushioned lounge under a pergola beyond a curved garden bed and level lawn

    A healthy lawn benefits from maintenance timed to its active spring growth. Hunters Hill project.

    7. Test and adjust the irrigation system

    Do not wait for the first hot week to discover that a dripper is blocked or a garden zone is not receiving enough water. Run each irrigation zone and check:

    • filters and drippers are clean
    • lines are intact and not leaking
    • sprays are reaching plants rather than paving
    • garden beds, lawns and pots are programmed as separate zones where possible
    • run times suit the soil, planting and season
    • the controller and rain sensor are working correctly

    Growing Rooms always installs a rain sensor with its irrigation systems. When there has been sufficient rain, the sensor prevents unnecessary watering so the system only runs when irrigation is still required. We use Hunter NODE-BT Bluetooth controllers, which allow clients to monitor and adjust their irrigation from their phone when the season or garden conditions change.

    Sydney Water notes that automatic irrigation can be efficient when it is well designed, programmed and maintained, with separate zones and weather-responsive controls. Its garden watering systems guide is a helpful overview.

    For more detail, read Is an Irrigation System More Water-Efficient Than Hand Watering?.

    8. Plant while conditions are mild

    Early spring can be a useful planting window, particularly where the soil is warming but extreme heat has not yet arrived. Choose plants for the actual light, soil, drainage and space available rather than appearance alone.

    New planting still needs consistent establishment watering. Grouping plants with similar water needs makes future irrigation more efficient and helps the garden perform as a coherent whole.

    9. Check decks, paving and outdoor areas

    Sweep and inspect decks, paving, steps, retaining walls and garden edging before the main outdoor-entertaining season. Look for slippery surfaces, failed joints, movement, drainage issues or timber finishes that need attention.

    Cleaning or restoration should suit the material. Overly aggressive pressure cleaning can damage timber, stone and grout, so use the appropriate method or bring in a professional where required.

    10. Prepare now for summer

    Spring maintenance should make the garden more resilient, not simply tidier. Prioritise healthy soil, appropriate mulch, efficient irrigation and plants suited to their position. These measures help reduce heat stress and make better use of water when conditions become hotter and drier.

    You can also read our guide to preparing your garden for an El Niño summer.

    A simple spring checklist

    • Inspect drainage, plant health and irrigation
    • Remove weeds before they seed
    • Prune according to plant type and flowering time
    • Add compost and plant-appropriate fertiliser where needed
    • Refresh mulch without burying stems or trunks
    • Renovate lawns only after active growth begins
    • Test every irrigation zone and the rain sensor
    • Complete new planting before the hottest weather
    • Inspect decks, paving and outdoor entertaining areas

    Keep your garden performing at its best

    Every garden responds differently to the changing season. Growing Rooms provides tailored, ongoing garden maintenance for prestige homes across Sydney, including pruning, lawn care, soil improvement, mulching, irrigation checks, planting, pest and disease management, and deck or paving restoration.

    Contact the Growing Rooms team to discuss a seasonal visit or an ongoing maintenance program for your garden.

  • What to Plant in Dry Shade Under Mature Trees

    What to Plant in Dry Shade Under Mature Trees

    The shade of a mature tree can be one of the most appealing places in a garden. It offers shelter, dappled light and a sense of permanence that takes decades to establish. Yet the ground beneath that canopy is often surprisingly difficult to plant.

    The problem is not shade alone. Mature trees intercept rainfall and their established roots compete strongly for moisture, nutrients and growing space. A plant described as “shade loving” may still struggle if it expects rich, consistently moist soil.

    Successful planting beneath a tree begins with understanding this combination of low light, dry soil and root competition. The goal is not to force a conventional garden bed into an unsuitable space. It is to select resilient plants, protect the tree and work with the character of the site.

    What is dry shade?

    Dry shade commonly occurs beneath large evergreen trees, dense shrubs and broad roof eaves. It can also develop on the sheltered side of walls or fences where little rain reaches the soil.

    Under a mature tree, the conditions often change from the trunk to the edge of the canopy. The inner area may receive almost no direct light or rainfall, while the outer edge gets brighter, dappled sun and more moisture. The planting palette should change with it.

    Shaded garden path with stepping stones, ferns and layered foliage beneath a Japanese maple
    Stepping stones pass through layered shade planting beneath a Japanese maple in this Bellevue Hill garden.

    Before choosing plants, observe:

    • how the light moves through the area during the day
    • whether the tree is evergreen or deciduous
    • where rainfall reaches the soil
    • how close the surface roots are
    • whether fallen leaves form a thick layer
    • whether existing irrigation reaches beneath the canopy

    Gardening Australia describes dry shade as a position where plants may be competing for water with established roots while also receiving little natural rainfall. Choosing plants that tolerate both conditions reduces—but does not eliminate—the need for supplementary watering.

    Five reliable plants for dry shade under trees

    The following plants suit different parts of the dry-shade zone. We have arranged them from the deeper shade closer to the tree towards the brighter, dappled light near the canopy edge.

    1. Cast-iron Plant (Aspidistra elatior)

    Few plants handle very low light as calmly as the Cast-iron Plant. Its upright, leathery leaves bring strong architectural form to dark areas where finer foliage can disappear visually.

    Aspidistra is slow-growing, which is useful beneath established trees because it is unlikely to overwhelm the space. It looks strongest planted in deliberate groups, allowing the repeated leaves to create a clean, generous layer.

    Aspidistra growing beneath a concrete barbecue bench in the Dover Heights garden
    Aspidistra fills the deeply shaded space beneath the concrete barbecue bench in this Dover Heights garden by Growing Rooms.

    The foliage can scorch in direct sun, so reserve it for the darker inner canopy or a deeply shaded side passage. Although it tolerates periods of dryness, it still needs regular watering while establishing and should not be planted into waterlogged soil.

    Best for: deep shade, sheltered positions and bold evergreen foliage.

    2. Clivia (Clivia miniata)

    Clivia is a classic choice beneath mature trees for good reason. Its broad, glossy leaves remain green throughout the year, while clusters of orange, yellow or cream flowers bring colour from winter into spring.

    Orange Clivia miniata flowers above broad evergreen leaves
    Clivia brings a strong burst of seasonal colour to shaded planting.

    The Adelaide Botanic Garden Plant Selector identifies Clivia as suitable beneath dense tree canopies, tolerant of drought and requiring minimal supplementary watering once established. Its leaves can burn in strong direct sun, making it especially useful in full or filtered shade.

    Clivias gradually form substantial clumps. Repeating them beneath trees creates a lush, settled quality without relying on a complicated mix of species. Remove tired leaves at the base and divide overcrowded clumps when necessary.

    Best for: full to part shade, winter and spring flowers, and broad textural foliage.

    3. Liriope (Liriope muscari)

    Liriope forms neat clumps of narrow, arching leaves and works well as a lower layer beneath trees and taller shade plants. Purple or white flower spikes can appear above the foliage, although flowering will be reduced in very deep shade.

    Mass-planted Liriope muscari flowering between large sandstone rocks
    Repeated clumps of Liriope create a low, flowering groundcover layer.

    It is adaptable to different soils provided drainage is reasonable, and it tolerates dry periods once established. The Adelaide Botanic Garden Plant Selector recommends it as a mass-planted understorey or weed-suppressing groundcover for well-shaded areas.

    We prefer using Liriope in repeated groups rather than as isolated edging plants. This creates a calmer carpet and allows it to connect larger-leaved plants such as Clivia and Aspidistra.

    Best for: full to part shade, low evergreen structure and mass underplanting.

    4. New Zealand Rock Lily (Arthropodium cirratum)

    New Zealand Rock Lily, sometimes called Renga Renga Lily, brings a softer and more relaxed quality to dappled shade. Its arching leaves form loose evergreen clumps, followed by airy stems of small white flowers in spring and summer.

    New Zealand rock lily with broad green leaves and sprays of pale pink and white flowers
    New Zealand Rock Lily in flower. Photograph by Krzysztof Golik

    It performs best where the canopy allows some filtered light. Once established, it tolerates dry periods and suits well-drained soils. Planted in broad drifts, the flowers appear to float through the shaded layer rather than forming a heavy block of colour.

    New foliage can attract snails and slugs, particularly after rain. Removing damaged leaves and old flower stems keeps the clumps looking fresh.

    Best for: part shade, dappled canopy edges and soft white seasonal flowers.

    5. Spiny-headed Mat-rush (Lomandra longifolia)

    Lomandra is best positioned towards the brighter edge of a tree canopy rather than in the deepest shade. Its strappy foliage brings movement and a distinctly Australian character, while its tough root system helps it establish in demanding sites.

    Established Lomandra longifolia mass planting with fine green foliage beside a garden path
    Mass-planted Lomandra longifolia creates a flowing structural edge beside a path.

    The species tolerates drought and a range of soil textures, although it performs best where drainage is good. Compact cultivars are particularly useful when the available planting pockets are limited or the foliage needs to remain clear of a path.

    Mass planting Lomandra at the canopy edge creates a natural transition between the shaded understorey and sunnier parts of the garden. It can also provide a strong repeated form beneath native trees without competing visually with their trunks.

    Best for: part shade, brighter canopy edges, native planting and repeated structural clumps.

    How to plant beneath a mature tree without damaging it

    The health of the existing tree comes first. Significant roots should never be cut simply to make room for a new plant, and a deep raised bed should not be built over the root zone.

    Gardening Australia’s guidance on gardening beneath gum trees recommends minimising soil disturbance, using small specimens or tube stock and digging only the small holes required for planting. This approach is equally useful beneath other established trees, where protecting the existing roots should take priority.

    Instead:

    • begin with smaller nursery plants that require narrower planting holes
    • locate natural pockets between roots using hand tools
    • remove failed lawn and weeds carefully rather than cultivating the whole bed
    • add only a modest surface layer of compost where appropriate
    • keep mulch and soil away from the trunk and exposed root flare
    • ask an arborist for advice if significant roots or a valuable tree could be affected

    Smaller plants may take longer to fill the space, but they are often easier to establish around mature roots and cause less disturbance during planting.

    Watering and mulching dry shade

    Drought tolerance describes an established plant, not a newly planted one. Even the toughest dry-shade species need consistent moisture while their roots grow beyond the original nursery rootball.

    Drip irrigation is particularly useful beneath mature trees because it can deliver water directly to new planting without relying on rainfall penetrating the canopy. Water deeply rather than applying frequent shallow sprays, then adjust the schedule as the plants establish.

    An organic mulch helps reduce evaporation and gradually improves the soil surface. Keep the layer moderate and leave a clear space around the tree trunk and the crowns of new plants. Where fallen leaves create a light natural mulch, they can often remain. Remove or redistribute them only if they form a dense mat that smothers low planting.

    Designing a layered garden in dry shade

    Foliage is more dependable than flowers in deep shade. Combine different leaf widths, forms and shades of green to create interest throughout the year.

    Aspidistra can form the broad, architectural layer in the darkest area. Clivia adds glossy foliage and seasonal colour. Liriope connects the larger plants with a finer evergreen carpet. New Zealand Rock Lily brings movement and white flowers into dappled light, while Lomandra carries the planting towards the brighter garden beyond.

    The strongest result usually comes from repeating a small number of plants in generous groups. Too many isolated varieties can make a difficult area feel fragmented and increase maintenance.

    It is also acceptable to leave the most root-filled area unplanted. A well-defined mulch zone around the trunk, combined with planting further out, can frame the tree more successfully than forcing plants into every available space. Stepping stones, gravel or carefully placed containers can add function and detail without disturbing major roots.

    What if nothing will grow beneath the tree?

    Some sites are simply too dark, dry or root-bound for dense planting, particularly beneath low evergreen canopies. In those conditions, changing the design is often more successful than repeatedly replacing failed plants.

    Consider:

    • concentrating planting around the brighter outer canopy
    • widening a mulched area around the trunk
    • introducing raised containers positioned without loading major roots
    • using stepping stones or a simple seating area
    • having an arborist assess whether selective canopy pruning is appropriate

    The mature tree is already the feature. The surrounding landscape should support it rather than compete with it.

    If you are looking for plants to cover the soil in brighter or more reliably moist positions, read our guide to native groundcovers for Sydney gardens. For help developing a planting scheme around established trees, explore our landscape and pool design service or contact the Growing Rooms team.

  • Cafe Reporter, Spring 2026

    Cafe Reporter, Spring 2026

    We were delighted to see Growing Rooms founder Oliver Sizeland profiled across pages 8 and 9 of Cafe Reporter’s Spring 2026 issue.

    The feature traces Oliver’s path through landscape construction and horticulture to founding Growing Rooms, and explores the combination of collaboration, technical understanding and thoughtful design that shapes our work. It also reflects something central to every Growing Rooms garden: responding to the site, the architecture and the people who will live with it, rather than imposing a single signature style.

    From compact Sydney courtyards and balconies to larger gardens and pools, we aim to create outdoor spaces that feel personal, work beautifully and bring genuine joy when they come to life.

  • Is an Irrigation System More Water-Efficient Than Hand Watering?

    Is an Irrigation System More Water-Efficient Than Hand Watering?

    When a Sydney summer becomes hot and dry, it is tempting to reach for the hose every evening. Hand watering feels attentive, but it can be surprisingly difficult to judge how much water has reached the roots—or whether every part of the garden has received the right amount.

    A well-designed irrigation system can usually water an established garden more consistently and efficiently than routine hand watering. The important words are well designed. Automatic irrigation is not inherently water-efficient. Its performance depends on how the garden is zoned, where the water is delivered, how the controller is programmed and whether the system is maintained.

    The best approach is not necessarily irrigation or hand watering. Automatic irrigation can take care of regular root-zone watering, while a garden lover still observes the plants and uses a hose or watering can when an individual pot or newly planted area needs extra attention.

    Why hand watering can be inconsistent

    Hand watering is useful because it puts you in the garden. You can spot a dry pot, wilting foliage, pests or a blocked drain while you work. It is ideal for containers, recently installed plants and small areas that need individual attention.

    However, it is easy to move the hose on before water has penetrated deeply into the soil. A quick sprinkle may wet the surface while leaving the root zone dry. It is also difficult to give every plant a consistent amount, particularly in a large or layered garden.

    Water applied from above can land on foliage, paving and walls rather than where the plant can use it. Watering in the heat of the day also increases evaporation. Over time, the most convenient areas may receive plenty of water while less accessible corners are repeatedly missed.

    What makes an irrigation system water-efficient?

    An efficient system begins with the garden design rather than the controller. Sydney Water notes that automatic systems can be efficient, but poorly designed, programmed or maintained systems can use more water than a garden needs.

    Several elements need to work together.

    Separate plants into suitable watering zones

    A sunny lawn, a shaded garden bed and a group of pots do not have the same water requirements. They should not all run for the same length of time.

    We divide a garden into zones—or hydrozones—so plants with similar needs are watered together. Each zone can then have a program suited to its planting, soil, exposure and method of water delivery. This avoids overwatering drought-tolerant plants simply to keep a thirstier area alive.

    Deliver water to the root zone

    Drip irrigation is often the most efficient choice for garden beds. It applies water slowly and close to the soil, reducing overspray onto paths and limiting the amount lost to evaporation.

    Water dripping slowly from an emitter in a garden irrigation line
    Drip irrigation delivers water slowly and directly to the soil around plant roots.

    The slow delivery also gives water time to soak into the root zone. On sloping sites or compacted soil, shorter repeated cycles can help water absorb rather than run downhill. Sprays still have a role in some lawns and larger areas, but their position and coverage need to be checked carefully.

    Program for the garden—not the calendar

    An irrigation program should change with the seasons. A garden may need more support during establishment and hot weather, then considerably less once its roots are established or temperatures fall.

    Run time also depends on soil. Sandy soil drains quickly, while heavier soil absorbs water more slowly and may need shorter cycles with pauses between them. The aim is thorough, less frequent watering that supports deeper roots, not constant superficial watering.

    Stop unnecessary watering after rain

    Growing Rooms installs a rain sensor with every irrigation system. When the sensor detects rain, it suspends the automatic watering program. The system resumes once the sensor has dried or the programmed delay has ended, helping prevent a scheduled cycle from running during or immediately after useful rainfall.

    Adjustable wired rain sensor used with an automatic garden irrigation system
    The rain sensor suspends scheduled irrigation after sufficient rainfall, helping prevent unnecessary watering.

    It is a simple feature, but an important one. A controller can follow its timetable perfectly without knowing that a storm has just passed. The rain sensor gives the system the information it needs to avoid that obvious waste.

    A rain sensor responds to rainfall rather than measuring moisture at every plant root, so observation still matters. After scattered showers, for example, pots beneath an eave may remain dry even though the rest of the garden received rain.

    The system we use in Growing Rooms gardens

    We use Hunter NODE-BT battery-operated Bluetooth controllers in many of our irrigation installations. Because the controller does not need a mains power connection, it can be a practical and discreet option for residential landscapes.

    Hunter NODE-BT Bluetooth irrigation controller installed inside a garden valve box
    A Hunter NODE-BT controller installed inside a garden valve box.

    The Hunter app allows the client to use a nearby phone to review programs, start or stop a station and make seasonal adjustments when required. It is local Bluetooth control—not remote access from anywhere—and Hunter lists a maximum connection distance of approximately 15 metres under ideal conditions.

    For many clients, phone access is much simpler than working through buttons on a controller hidden inside a valve box. It also makes it easier to reduce watering after a cool change, add support during a hot spell or test an individual zone while inspecting the garden.

    The brand is only part of the result. The real efficiency comes from correctly arranged zones, suitable emitters, sensible programming, a rain sensor and ongoing adjustment as the garden matures.

    We source our irrigation components through Reece, whose garden and irrigation range includes Hunter controllers and related equipment.

    Is automatic irrigation better for plants?

    Consistency is one of its greatest benefits. New gardens need reliable watering while roots establish, and a missed week during hot weather can undo months of progress. A programmed system gives each zone regular support even when the household is busy or away.

    Root-zone delivery also helps keep unnecessary moisture off leaves and flowers. This can reduce marking on sensitive foliage and makes more of the applied water available to the plant.

    Automatic does not mean “set and forget”. Plants communicate through their growth, foliage and soil condition. A system should be checked and adjusted rather than allowed to run unchanged for years.

    When hand watering is still the right choice

    Keep the hose or watering can for:

    • pots and planters that dry at different rates
    • individual new or transplanted plants
    • areas sheltered from rainfall
    • plants showing stress during an exceptional hot spell
    • checking how quickly water is soaking into the soil
    • rinsing and testing while an irrigation fault is repaired

    Hand watering is most useful when it is targeted. It complements an efficient irrigation system rather than duplicating the entire scheduled program.

    A simple irrigation maintenance check

    At the beginning of spring and before extended hot weather:

    • run every zone and look for leaks, blocked drippers and damaged lines
    • check that sprays are not watering paving, fences or buildings
    • clear soil and mulch away from buried or blocked emitters
    • confirm that each zone still matches the planting it serves
    • test the rain sensor
    • check the controller battery and review the program
    • reduce or increase seasonal settings as conditions change

    Sydney Water's Water Wise Guidelines apply throughout the year. At the time of writing, gardens may be watered with drinking water before 10 am or after 4 pm, while drip irrigation and smart watering systems may also be used between 10 am and 4 pm. Water should never be allowed to run onto paths or roads.

    Designing irrigation as part of the garden

    The best time to plan irrigation is while the landscape is being designed. Garden beds, lawns, pots, levels and planting zones can then be considered together, with lines installed before access becomes difficult.

    For an existing garden, an irrigation audit can still make a substantial difference. Correcting a leaking line, separating an unsuitable zone or adjusting an old program may save water and improve plant health without replacing the entire system.

    If you are planning a new Sydney garden or would like help reviewing an existing watering system, speak with the Growing Rooms team. We can integrate planting, soil preparation and irrigation so they work as one landscape rather than as separate afterthoughts.

  • How Much Should You Budget for a Garden Renovation?

    How Much Should You Budget for a Garden Renovation?

    Planning a new garden often begins with ideas: a pool, an outdoor entertaining area, more privacy, better access or simply a greener outlook from the house. Before any of those ideas can become a design, however, there is an important practical question to answer: how much should you budget?

    One useful starting point is the value of your home. As a general guide, allowing 5–10% of the property's value for a professionally designed and constructed landscape can create a realistic framework for an extensive garden renovation. This commonly cited range appears in Australian landscaping guidance from both realestate.com.au and hipages.

    It is only a guide. Property value does not determine what a garden will cost, and investing 10% does not guarantee an equivalent increase in resale value. What it can do is help establish a level of investment that feels proportionate to the home before the design and construction details are known.

    Garden renovation budgets based on property value

    The table below applies the 5–10% guide to a selection of property values. It is intended as an early planning tool, not a quotation.

    Approximate property value 5% guide 10% guide Initial planning range
    $1.5 million $75,000 $150,000 $75,000–$150,000
    $2 million $100,000 $200,000 $100,000–$200,000
    $3 million $150,000 $300,000 $150,000–$300,000
    $4 million $200,000 $400,000 $200,000–$400,000
    $5 million $250,000 $500,000 $250,000–$500,000
    $7 million $350,000 $700,000 $350,000–$700,000

    All figures include GST and are general examples only. Every property, design and construction scope is different.

    These figures may initially appear high if you are thinking mainly about plants. A complete landscape renovation, however, can involve far more than planting. Demolition, excavation, drainage, retaining walls, paving, decking, lighting, irrigation, carpentry, a pool, a spa or an outdoor room can all form part of one integrated project.

    The value of the percentage guide is not that every homeowner should spend within it. Its value is that it prompts an early, honest conversation about the relationship between the property, the desired result and the work required to achieve it.

    What can you achieve at different investment levels?

    Under 5%: a targeted garden improvement

    Spending less than 5% of the home's value can be entirely appropriate when the existing structure of the garden is sound. Rather than rebuilding everything, the project might focus on the elements that will make the greatest difference.

    This could include:

    • renewing tired planting
    • improving lawns and garden beds
    • adding irrigation or garden lighting
    • creating a defined entertaining area
    • replacing an area of paving
    • improving privacy with layered planting
    • retaining and working around mature trees or sound existing structures

    A targeted project can still transform how a garden looks and feels. Careful design is important because the new work needs to sit naturally alongside what remains.

    Between 5% and 10%: a complete landscape transformation

    For many substantial garden renovations, the 5–10% range provides room for a more cohesive design-and-build approach. Depending on the site and brief, the scope may include:

    • redesigning the front and rear gardens
    • a pool or spa
    • demolition and site preparation
    • new levels, steps or retaining walls
    • drainage and irrigation
    • paving, decking or other hard landscaping
    • an outdoor entertaining area
    • custom seating, screening or joinery
    • lighting and a complete planting scheme
    Mosaic-tiled pool with stone seating, layered planting and a covered outdoor dining area in Clovelly
    Pools, structural work, entertaining areas, custom details and planting can all form part of one integrated landscape project.

    This does not mean every item will fit into every budget. A level, accessible site with valuable existing elements may allow more of the investment to be directed towards finishes and planting. A steep or difficult site may require a larger share to be spent below ground or on structural work.

    Above 10%: complex sites and lifestyle-led projects

    There are circumstances where investing more than 10% is appropriate. A highly detailed outdoor environment can effectively extend the living space of the home and change how the property is used throughout the year.

    Budgets can move beyond the general guide when a project includes extensive excavation, a new pool and spa, a cabana, an outdoor kitchen, major level changes, premium natural stone, mature specimen planting or substantial engineering and approval requirements.

    This is not automatically overcapitalisation. Someone preparing a home for sale will evaluate the investment differently from a family planning to enjoy the property for another 15 or 20 years. Privacy, daily use, entertaining, shade and a stronger connection between the house and garden all have value, even when that value cannot be reduced to a future sale price.

    Swimming pool at dusk with a warmly lit outdoor dining and lounge pavilion in Dover Heights
    For a long-term home, the value of a garden renovation also lies in how the space is used and enjoyed over many years.

    What determines the real cost of a garden renovation?

    Two gardens of a similar size can have very different construction costs. The following factors usually have more influence on the final price than the property's value alone.

    The project scope

    A planting renewal is fundamentally different from a full landscape transformation. Pools, spas, decks, covered outdoor rooms, kitchens, built-in seating and new boundary treatments increase both the number of trades involved and the complexity of coordinating the work.

    Site access

    Good access allows machinery and materials to move efficiently. On a narrow Sydney block, soil, stone and waste may need to be carried by hand through a side passage or even through the house. Restricted access adds time and labour at almost every stage.

    Slope, soil and existing levels

    Sloping gardens may need excavation, engineered retaining walls, stairs and carefully planned drainage. Soil type also matters. A site that appears straightforward from the surface may require additional preparation before structures, paving or planting can be installed correctly.

    Materials and finishes

    Natural stone, premium timber and bespoke metalwork create a different level of finish from standard concrete or off-the-shelf products. Neither approach is automatically right or wrong. The important thing is to select materials that suit the architecture, intended use and overall budget.

    Floating concrete steps beside layered planting leading towards a glass-fenced pool and white pergola
    Levels, structures, materials and planting all need to be resolved together during the design process.

    Plant size and maturity

    Younger plants are more economical and often establish readily, but they take time to fill out. Advanced trees, hedges and feature specimens create greater immediate impact and privacy, with a corresponding effect on supply, transport and installation costs.

    Consultants and approvals

    Depending on the project, the budget may also need to cover surveyors, engineers, arborists, planners, certifiers and council or approval fees. These services are especially relevant when the design includes pools, significant structures, retaining or work near protected trees.

    Why every garden renovation needs a contingency

    Even a carefully investigated and documented project can reveal conditions that were impossible to see before construction began.

    Excavation for a pool may uncover rock. Demolition may expose an old drainage problem. Previous building work may have left concrete, rubble or other waste buried beneath the garden, which then needs to be removed and disposed of correctly.

    A contingency allowance provides a buffer for these unforeseen conditions. The appropriate amount depends on the site, the proposed work and how much can be established before construction. It should be discussed during the design and quotation process rather than added as a generic percentage without considering the property.

    Contingency is not a substitute for thorough planning. It works alongside site investigation, detailed documentation and transparent quoting to help the project respond sensibly if something unexpected is found.

    Should you spend the same amount if you plan to sell?

    Not necessarily. If you expect to sell soon, the priority may be presentation rather than complete reinvention. Healthy planting, a welcoming entrance, well-defined outdoor areas and repaired or refreshed existing surfaces can improve the impression of the property without rebuilding the entire garden.

    For a long-term home, the calculation is broader. You may place greater value on a pool for the family, a shaded dining space, privacy from neighbours or a garden that can be enjoyed from inside the house. In that situation, the return is partly financial and partly the accumulated value of using the space for many years.

    It is wise to avoid treating landscaping as a guaranteed equation. A well-designed garden can strengthen street appeal, improve the relationship between indoors and outdoors and make a home more enjoyable. It cannot guarantee that the entire construction cost will be added to the eventual sale price.

    Where should you invest first?

    When the wish list is larger than the available budget, we recommend protecting the parts of the project that are difficult or costly to change later.

    Start with a strong overall design. Resolve levels, drainage, access and the relationship between the home, pool and primary outdoor living area before concentrating on decorative details. Good planning allows the most important structural work to be completed correctly and helps identify elements that could be simplified or staged.

    Planting should not be treated as whatever is left after construction. Trees, screening, shade and layered greenery are what turn a collection of built elements into a garden. A clear planting framework also improves with time, giving the landscape a sense of maturity that cannot be installed overnight.

    Elevated view across a tropical garden with pool, lawn, glass fencing, paths and an outdoor pavilion
    A complete plan helps the pool, levels, circulation, outdoor living and planting work as one landscape.

    Can a garden renovation be completed in stages?

    Yes, provided the stages are based on one complete plan. Designing the whole landscape first helps ensure that early decisions do not create problems or unnecessary costs later.

    For example, drainage, underground services and major level changes may need to be resolved before paving and planting. Future pool access may also need to remain clear. A staged approach works best when each phase feels complete while still supporting the next.

    How Growing Rooms approaches garden renovation budgets

    At Growing Rooms, we discuss budget early in the landscape and pool design process. This helps us understand which parts of the brief matter most and develop a design that is both ambitious and achievable.

    Every garden is unique. We do not assume that a property of a certain value needs a particular list of features or a fixed level of finish. We consider the architecture, site conditions, existing landscape, lifestyle and priorities, then work towards the client's budget.

    Once the design is developed, an itemised construction estimate provides a clearer picture of where the investment lies. It also makes it easier to refine materials, adjust scope or plan stages without losing the central idea behind the garden.

    If you are considering a garden, pool or complete outdoor transformation in Sydney, contact the Growing Rooms team to discuss your property, priorities and preferred investment range.

    Frequently asked questions

    Is 5–10% of a home's value a realistic garden renovation budget?

    It can be a useful starting point for a professionally designed and constructed landscape, but it is not a rule or quotation. The appropriate budget depends on the site, desired scope, materials, structures and existing elements that can be retained.

    Does a pool count as part of the garden renovation budget?

    Yes. When using the percentage as an overall planning guide, a pool can be included. Pool excavation, engineering, finishes, equipment, fencing and the surrounding landscape can represent a significant portion of the total investment.

    What parts of landscaping generally cost the most?

    Excavation, retaining, drainage and major hard landscaping can consume a substantial part of the budget. Pools, outdoor structures, difficult access, premium materials and bespoke details can also increase the cost significantly.

    Will landscaping add the full project cost to my home's value?

    There is no guaranteed return. A well-designed garden may improve street appeal, outdoor living and the overall presentation of a property, but eventual resale value also depends on the market, location, workmanship and what buyers value at the time.

    How much contingency should I allow?

    There is no single figure suitable for every garden. The allowance should reflect the site and construction scope, particularly where excavation, demolition, retaining or pool construction may reveal hidden conditions. Your designer and construction team can recommend an appropriate buffer once the project is better understood.

  • The Best Native Groundcovers for Sydney Gardens

    The Best Native Groundcovers for Sydney Gardens

    Groundcovers may sit at the lowest level of a planting scheme, but they do some of the hardest work in the garden. They soften paths and retaining walls, cover bare soil, help hold moisture around plant roots and bring a finished, layered quality to the landscape.

    Australian native groundcovers are particularly useful in Sydney gardens. They can help reduce erosion, limit weed growth and act as a living mulch. There are varieties for hot coastal sites, dry slopes, shaded areas beneath trees and the narrow spaces between stepping stones. Once established, the right plant can also reduce exposed soil and make it harder for weeds to take hold.

    The important words are the right plant. No groundcover will thrive everywhere, and a plant that forms a beautiful carpet in sheltered shade may struggle against reflected heat beside a west-facing wall. Start with the conditions, then choose the plant.

    Why use native groundcovers?

    Native groundcovers offer much more than a way to fill an empty space. In a well-designed garden, they can:

    • soften the transition between planting and paving
    • spill over retaining walls and the edges of raised garden beds
    • help stabilise soil on banks and sloping sites
    • shade the soil and reduce moisture loss
    • create habitat and seasonal food for insects and small birds
    • replace small or difficult areas of lawn
    • connect larger shrubs, grasses and trees into one cohesive planting scheme

    They are also an effective way to bring movement and detail into a garden without blocking views. Low planting alongside a path or driveway can make the space feel wider, while a repeated carpet beneath trees allows their trunks and forms to remain visible.

    How to choose the right native groundcover

    Before choosing a plant, look closely at the site. How many hours of direct sun does it receive? Is the soil sandy and free-draining, or heavier and slow to dry? Will the plant need to tolerate salt-laden wind, reflected heat, tree-root competition or occasional foot traffic?

    It is equally important to check the plant’s mature spread. A vigorous groundcover can be wonderful on a broad bank, but overwhelming beside a narrow path. A delicate native violet is ideal in cool, moist shade, but is not the right choice for an exposed, dry slope.

    Rather than mixing many varieties in a small bed, we generally prefer to repeat one groundcover in generous groups. This creates a calmer, more resolved landscape and allows the foliage to form a continuous layer around feature plants.

    Our favourite native groundcovers for Sydney gardens

    1. Kidney Weed (Dichondra repens)

    Despite its common name, Kidney Weed is a desirable Australian native with small, rounded leaves and a soft, lawn-like appearance. It spreads by creeping stems and performs especially well in sheltered areas with some shade and reliable moisture.

    This is one of our favourite choices between stepping stones or beneath open-canopied trees. It can tolerate occasional, light foot traffic, making it useful where conventional lawn is patchy or difficult to mow. It is not a substitute for hard-wearing turf in a busy play area, and it will look its best when protected from hot afternoon sun and allowed to establish evenly.

    Best for: part shade, stepping-stone joints, sheltered courtyards and low-traffic lawn alternatives.

    2. Native Violet (Viola banksii, often sold as Viola hederacea)

    Native Violet creates a fresh green carpet beneath trees and in other cool, shaded parts of the garden. Its small white and violet flowers appear above rounded leaves, bringing a gentle layer of colour to spaces that can otherwise feel dark or bare.

    In our designs, we often combine Native Violet with Kidney Weed rather than relying on a single species. Their slightly different growth patterns and seasonal performance help create a fuller, more resilient groundcover carpet that continues to look good throughout the year.

    Native violet and Dichondra forming a mixed groundcover carpet beside sandstone cobbles and lawn
    Native violet and Dichondra combine to form a flowering groundcover carpet between sandstone cobbles and lawn.

    It prefers moisture-retentive soil and can spread enthusiastically when conditions suit it. We like using it around tree trunks, beside shaded paths and beneath taller shrubs, where it creates a natural woodland character. It is less suited to dry shade with intense root competition unless the soil and irrigation have been carefully considered.

    Best for: moist shade, beneath trees and shrubs, and sheltered garden edges.

    3. Creeping Boobialla (Myoporum parvifolium)

    Creeping Boobialla is one of the most useful native groundcovers for sunny Sydney gardens. Its fine foliage forms a low, spreading mat, dotted with small white or pale pink flowers through the warmer months.

    White flowers among the green foliage of Yareena creeping boobialla
    Yareena™ Creeping Boobialla (Myoporum parvifolium ‘PARV01’). Image courtesy of Ozbreed.

    It is well suited to open garden beds, embankments and the edges of paths, where its dense growth can cover bare soil and help reduce erosion. It can also spill attractively over low retaining walls. Depending on the form and conditions, a single plant can spread well beyond a metre, so allow it room rather than crowding it against paving.

    Best for: full sun to part shade, broad garden beds, slopes and retaining-wall edges.

    4. Mundi™ Westringia (Westringia fruticosa ‘WES05’)

    Mundi is a low, spreading form of coastal rosemary with fine grey-green foliage and small white flowers. It grows higher than a true ground-hugging carpet, creating a softly mounded layer that suits both contemporary and naturalistic gardens.

    Low rounded Mundi Westringia shrubs flowering in a landscaped garden
    Mundi™ Westringia (Westringia fruticosa ‘WES05’) creates a low, softly mounded layer. Image courtesy of Ozbreed.

    This is an especially useful choice for exposed Sydney sites. It tolerates coastal wind, periods of dry weather and a range of well-drained soils. Mass planted beside a driveway, through a front garden or above a retaining wall, it gives the landscape structure without the maintenance demands of a tightly clipped hedge.

    Best for: coastal gardens, sunny or partly shaded beds, low borders and contemporary mass planting.

    5. Meema™ Hardenbergia (Hardenbergia violacea ‘HB1’)

    Meema is a shrubby groundcover form of the familiar native sarsaparilla. It forms a broad mound of clean green foliage and produces masses of purple pea flowers from winter into early spring, when colour in the garden can be especially welcome.

    Purple flowers and green foliage of Meema Hardenbergia
    The purple winter flowers of Meema™ Hardenbergia (Hardenbergia violacea ‘HB1’). Image courtesy of Ozbreed.

    It works well on slopes and in larger beds, where its foliage can spread beneath taller planting. Unlike the climbing form of Hardenbergia, Meema has been selected for a tidier groundcover habit, although it may still climb if it finds support. An annual prune after flowering will help maintain its shape.

    Best for: full sun to semi-shade, slopes, larger beds and winter colour.

    Planting native groundcovers successfully

    Even drought-tolerant plants need regular watering while their root systems establish. Prepare the soil before planting, water deeply and use a suitable mulch between young plants while they grow together. Keep mulch clear of stems and avoid piling it against trunks or crowns.

    Spacing is also important. Planting too far apart leaves bare ground exposed for longer; planting too closely can create unnecessary competition and poor airflow. Use the expected mature width—not the size of the nursery pot—to calculate quantities.

    Weeds should be removed before planting and controlled during establishment. As the groundcover closes over, it will shade more of the soil and reduce opportunities for new weeds, but no planting scheme is completely maintenance-free. Occasional trimming, weeding and replenishing mulch will keep the area looking considered rather than overgrown.

    When feeding native plants, choose a low-phosphorus fertiliser formulated for Australian species and follow the label carefully.

    Designing a layered native garden

    The strongest groundcover planting is rarely designed in isolation. Combine low carpets with the upright form of native grasses, the structure of shrubs and the canopy of small trees. Repeating the same groundcover through these layers ties the garden together and gives individual feature plants room to breathe.

    For a sunny coastal garden, a sweep of Mundi Westringia can sit beautifully beneath sculptural grasses and banksias. In a shaded garden, Native Violet and Kidney Weed can combine to create a softer, more persistent floor beneath tree ferns, correas and established trees. On a broad sunny slope, Creeping Boobialla or Meema Hardenbergia can be punctuated with taller flowering shrubs to add height, habitat and seasonal colour.

    Flowering groundcover beneath a Japanese maple beside curved sandstone steps
    Flowering groundcover creates a soft layer beneath a Japanese maple in a shaded garden.

    The result should feel generous and natural, while still being clearly designed.

    If you enjoyed this guide, you may also like our article on native grasses for the Australian garden. For help developing a planting palette suited to your site, explore our landscape and pool design service or speak with the Growing Rooms team.
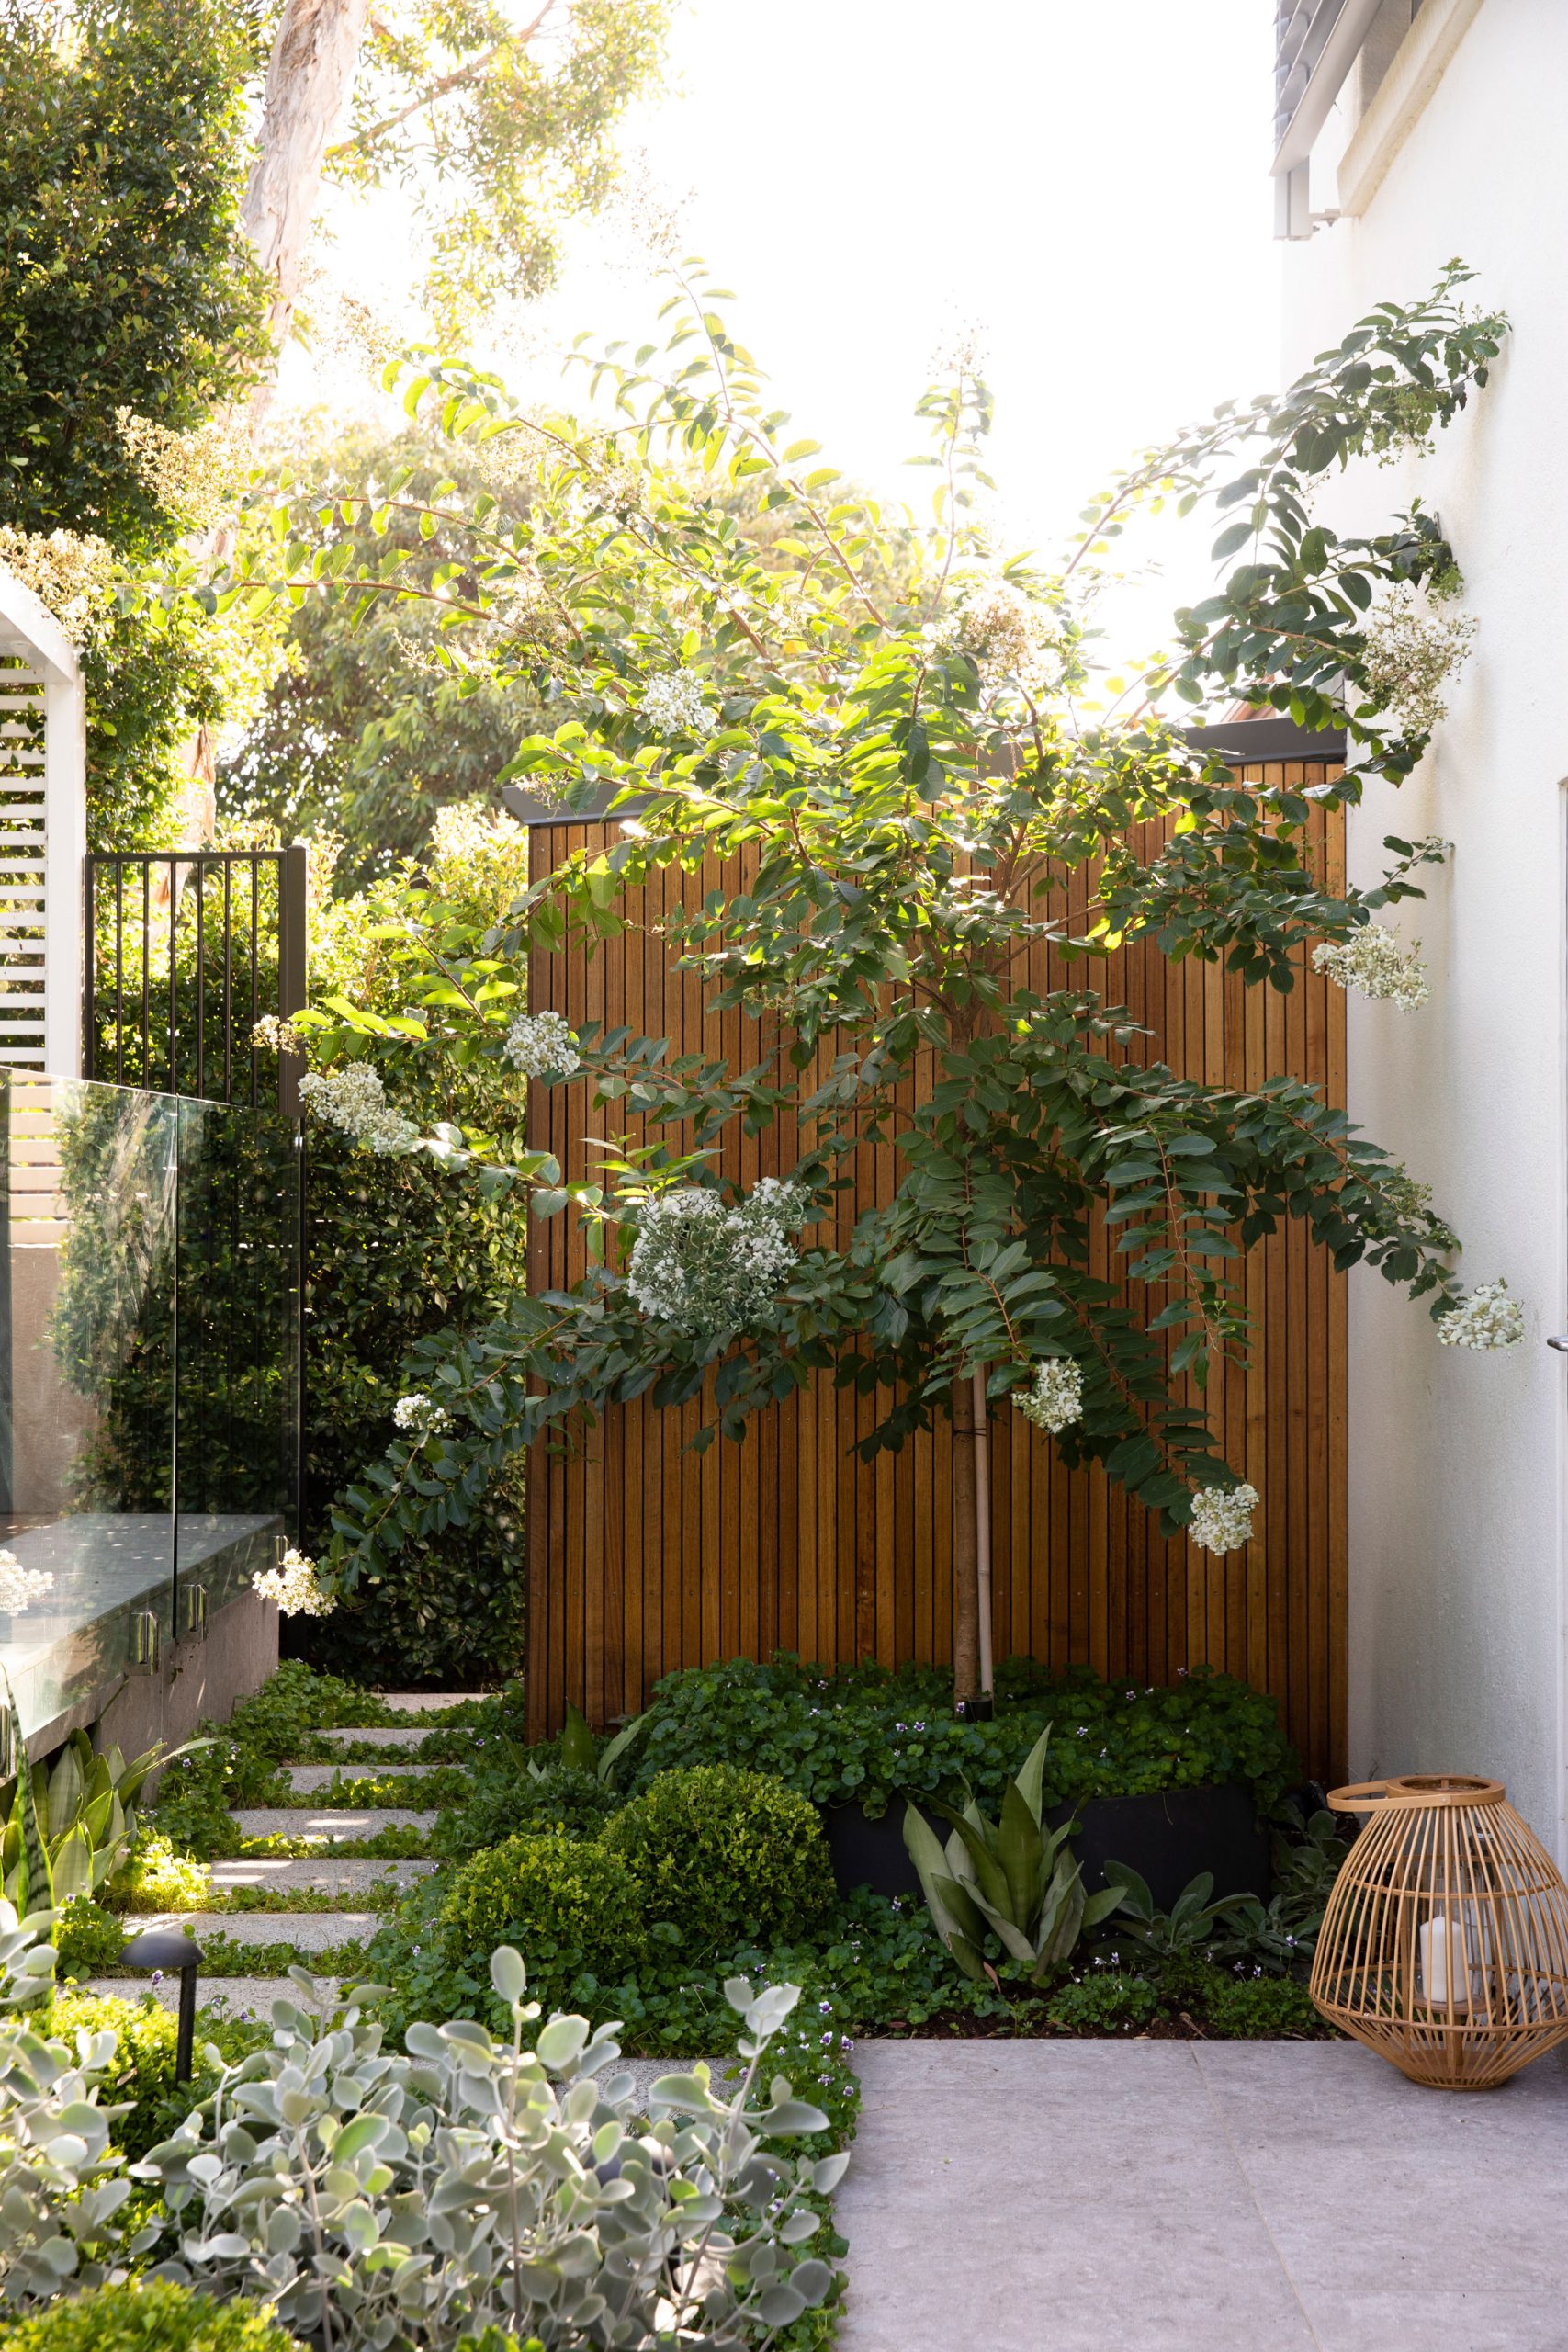
  • Designer Gardens 2026

    Designer Gardens 2026

    We were delighted to see our Clovelly garden featured across six pages of the 2026 edition of Designer Gardens.

    The story follows a complete front and rear garden transformation, centred on a floating pool, a considered alfresco dining space, and a palette of limestone, timber and lush layered planting. Lighting, privacy planting and a refreshed entry bring the spaces together from day through to evening.

    This garden has also been recognised with a Gold award in the 2022 LDI Design Awards for Residential Landscape Design (Mid Size), alongside Silver and Bronze awards in the 2021 Landscape Excellence Awards.